++Scissors, Wire Cutters, Floral Wire (or pipe cleaners if you have fat fingers like me), Zip Ties, Glue Gun
++Ribbon 2.5” & 1.5” widths for a bow with 5 loops measuring a yard each
++Floral picks –Here is a tip, purchase floral picks that are premade with items that are already wired together in layers and give a cascading effect. I purchased mine from Carolina Pottery and Hobby Lobby
++Filler – These can be cut from larger flower bushes but can be small flowers, fall leaves, berries, etc. I purchased mine from Hobby Lobby
++Add-ins – These are items like pine cones (save money by using fresh, check my blog on How To Prepare Pine Cones for crafts), pumpkins, ornaments, flowers, etc.
++Larger focal points – This can be hanging ornaments, larger flowers, etc.
++Lantern – The one used for this tutorial measures 18” tall but I’ve used this technique on lanterns measuring 14” & 20” tall and it works great! Purchase lanterns at Hobby Lobby, Pottery stores or Amazon
Now let me show you my technique for making a fall lantern swag, see full video at bottom.
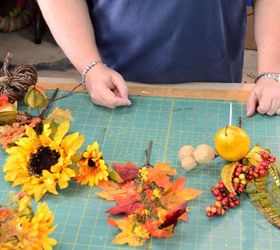
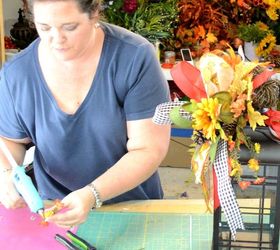
Step 1 – Choose Your Colors
I find that for beginners, it is best to pick three colors from the floral pick and then make sure all the other elements in the arrangement contain these same three colors. For example; once your floral pick is selected, choose filler flowers, picks, add-ins and ribbon that contain these three colors. Of course, this is not a hard rule but only my suggestion for beginners. Once you get the feel for color coordinating, you can mix and match any color under the rainbow.

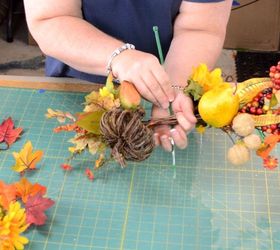
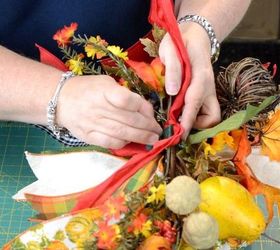
Assemble the base by gathering and layering the floral picks, fillers, add-ins, and focal piece in your hand. I find it is best to stagger the items all the way up. Make sure that it is long enough to cover the entire length of the lantern on one side to create a cascading effect. Then switch and add shorter pieces of flowers, filler, add-ins and picks going in the opposite direction. Use your hand to gather all the items and this also saves a space for the bow so make sure to leave enough room so that your bow is not too crowded. Once you have the items positioned in your hand, use zip ties and zip tie the stems together. I use two zip ties for added security. Once you like what you have, zip tie the stems together in two places.
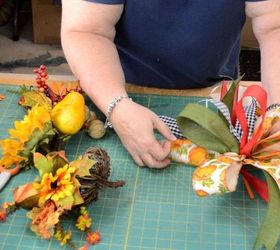
For the bow, you can easily make a regular bow, but for me I like to have more ribbon colors so I make a funky bow. Start by cutting two pieces of the 2.5” width ribbon and three pieces of the 1.5” width ribbons 1 yard long. I like to be able to form 5 loops, so 5 pieces of ribbon whether you choose all one ribbon or mix it up like I did, but all measuring 36” long.
To form the loops of the bow, I come up 6-8” from the bottom of one streamer and pinch. Then fold the ribbon away from you making a 6” loop and pinch. Twist the ribbon so that the pretty side is facing you. Continue adding each ribbon in this same manner. Once all the ribbon is added, tie it off with a pipe cleaner. Watch the complete video below demonstrating how I make my funky bows.
To add the bow to the swag, twist the pipe cleaner of the bow around the swag base, trim the excess pipe cleaner off and tuck it into the swag.
Don’t forget to dove tail the ends of the ribbon to give it a professional look.
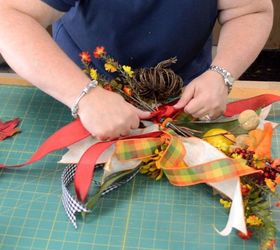
You can use moss covered wire, grapevine wire or jute cover wire for the tie but in this video I used a 1.5” wide ribbon cut 50” long. I tie it in a knot on the back up the swag base above the bow on the side containing the shorter picks.
Once you have the tie knotted around the swag base, attach it to the lantern. For my lantern, I tie it around the large part on top, you may need to secure yours on the handle as each lantern is different. I tie it in a bow on the back of the lantern. Continue decorating the swag while it is tied onto the lantern.
Using extra pieces of filler such as leaves, berries and flowers, hot glue these stems into the ribbon loops of the bow making sure the glue adheres to the ribbon.
Cut the ends of longer picks short so they can’t be seen from the front. Feel free to trim the ribbon tails if needed if they are too long. Move the ribbon tails around the swag so that some are in the front, sides and back. I like to have long ribbon tails on the same side as the cascading flowers. Use Uglu Dashes by Oasis to help the ribbon stay in place by taping the ribbon to the flowers.
Once you have added all the filler to the bow and you like how the swag looks, take it off of the lantern and turn it over. Hot glue leftover silk leaves such as ivy on top of the pipe cleaner and zip ties in order to hide the mechanics. This gives your swag a professional look.

Original article and pictures take http://www.hometalk.com/10145901/diy-fall-lantern-swag site
Комментариев нет:
Отправить комментарий