Making a "Hocus Pocus" style spell book using tissue paper, clay, twine, paint, mod podge, a little glue, & a 26mm half round eye.... (I get the eyes from ebay)This book was made for an artist / photographer friend who will be writing her own spells, (fairy tale type "think Snow White poison apple type stuff" ) poems, & doing art work inside the book so instead of the usual goodwill book, I picked up an artists sketch book at walmart.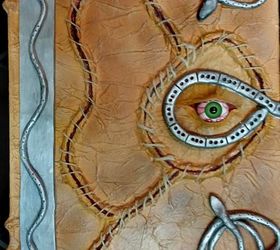 First I sketched out the stitching lines on the book cover, then made wadded up rolls of tissue paper & glued them down along the stitch lines, making sure the rolls were large enough to later cut down the middle with an exacto knife & sew through.
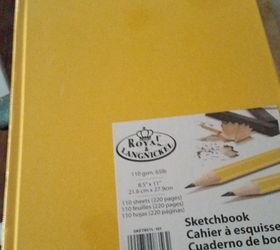 Once the stitch rolls were glued & dry I cut & shaped a piece of cardboard (from a Dr. Pepper box) to form the upper eyelid using a 26mm half round eye as my guide ( I order the eyes on ebay) & glued the lid down, but NOT the eye yet. Next the entire top of the book along with the stitch lines & lid were coated with mod podge, then a pre-crumpled, then un-crumpled piece of tissue paper was placed across the top of the book, gently working the tissue paper up around the edges of the stitch lines, & up inside the upper lid leaving enough excess on the outer edges to be folded over into the book cover. Next quickly smooth out any air bubbles or puffed up wrinkles. Once the mod podge dries on the cover of your book, coat the spine & back of the book with mod podge, & cover with tissue paper & let dry. Once dry base your book in acrylic craft paint, also split your stitch lines & paint with a dark dried blood color.
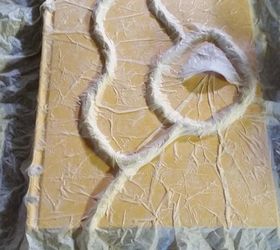 After your base paint has dried, it's time to add the eye, & lower eyelid. I made the lower lid the same as the upper lid gluing cardboard shaped around the eye. To give a little puffiness below the eye, I glued a bit of cotton ball around the lower lid then covered the area with mod podge & bit of crumpled tissue paper making sure not to go over the stitch lines. After the mod podge dries base in the under eye in the same color as the rest of the book, & then using a dry brush dust in whatever shading & highlighting you want. After the paint has dried I cover the eye & give the book a light coat of clear satin spray.
 Now it's time to stitch it all up.... Using an upholstery needle threaded with thin twine stitch your book skin up. Keep a pair or needle nose pliers handy because it can be tough to get that needle through in places but be careful not to tear your cover skin when pulling it through.
 After sewing around all the stitch lines, knot your thread off & add a bit of glue to the knot to make sure it stays tied!
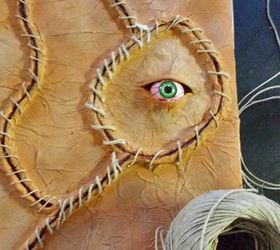 Ok, stop laughing! Yes, I burned the clay! No matter, it's going to be painted anyway. Make thin rolls of bakeable clay to form your snakes, & whatever that long straight piece is, along with the ring for the clasp around the eye. (clasp not pictured) Once your clay snakes are baked paint them if needed, then glue them to the cover of your book.
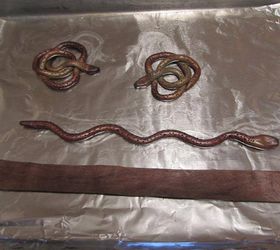 & you now have a "Hocus Pocus" style spell book! The ring I made for the eye is not an actual clasp but only lips over the edge of the upper book cover since it will be opened frequently & I didn't want to worry about the clay breaking from excessive use. Also the clasp on the book in the movie is a little different, but I am no clay expert, as you can tell by the burnt clay in the last picture but it works for me!
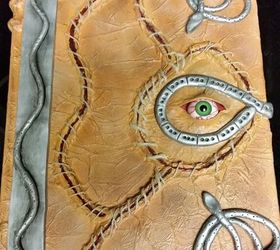 Here is one of the photos from the Halloween themed photo sessions my friend Sussan is using her book for........ :) https://www.facebook.com/FireAngelPhotography?fref=ts
Original article and pictures take http://www.hometalk.com/10124121/it-s-only-a-little-hocus-pocus site
Комментариев нет:
Отправить комментарий