среда, 24 мая 2017 г.

How to Make a Garden Art Dish Flower


The most difficult part of making a plate or dish flower is finding the pieces to put it together. I find all of my pieces at thrift stores, garage sales etc.


Once you have some pieces that you'd like to use the actual assembly of your dish flower is pretty easy.


how to make a garden art dish flower, crafts, gardening, repurposing upcycling


For this dish flower I'm using a vintage 9" silver plate tray bottom from a tiered stand, a large but low glass bowl, a blue decorative bowl, and a flower shaped candle holder.


how to make a garden art dish flower, crafts, gardening, repurposing upcycling


So first the glass bowl gets glued on.


how to make a garden art dish flower, crafts, gardening, repurposing upcycling


Always apply the glue to the raised parts of the bottom of each piece or they won't adhere well if at all.
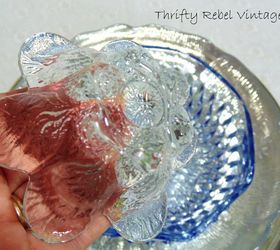
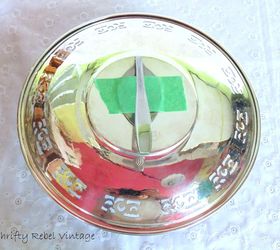
Hopefully you can see in this pic that the glue is applied to the raised outside edge of the bottom.


how to make a garden art dish flower, crafts, gardening, repurposing upcycling


Once each piece is down just wiggle it in place a bit to make sure there's a good connection between the pieces.


how to make a garden art dish flower, crafts, gardening, repurposing upcycling


The candle holder also had raised parts on its bottom so that is where the glue was applied.


how to make a garden art dish flower, crafts, gardening, repurposing upcycling


And again wiggle a bit once put in place.
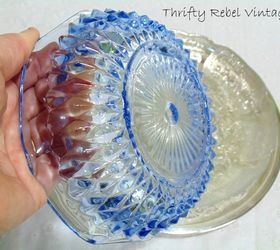
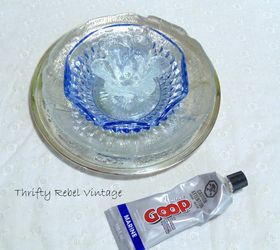
Here's the glue I use... Marine GOOP adhesive. It's used in boat repair and is UV and water resistant. I've heard that E6000 works well also, but I've never used it for outdoor projects.


how to make a garden art dish flower, crafts, gardening, repurposing upcycling


Tape all the pieces with painters tape for about 30 minutes so they don't move. Believe me that can happen.
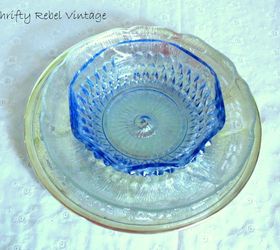
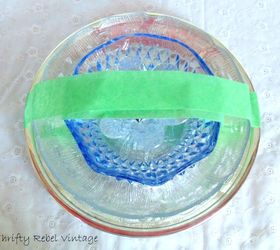
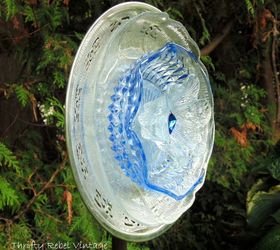
Remove the tape, and let your dish flower cure for about 24 hours in a cool place. This is important, the glue won't cure properly in hot and/or humid conditions.


how to make a garden art dish flower, crafts, gardening, repurposing upcycling


I find stainless steel tablespoons for 10 cents each at my local thrift store. The spoon should be flattened and bent like above.


how to make a garden art dish flower, crafts, gardening, repurposing upcycling


Decide where the top of you dish flower will be at the front and glue the spoon accordingly on the back.
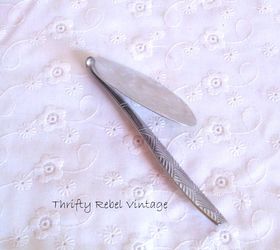
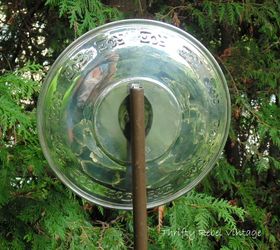
Tape the spoon in place and let it cure for about 24 hours. It needs to be fully cured before you place it into the pipe to display in your garden.


how to make a garden art dish flower, crafts, gardening, repurposing upcycling, Glue the spoon to the back of the flower


Before you glue the spoon make sure the end is not too wide for whatever pipe you're going to use. I use 1/2" or 3/4" copper pipe, but any pipe you have around will work. Just make sure your spoon handle will fit.
Once your dish flower is cured place the spoon into the pipe, which should be inserted into the ground about 10-12" to give it strength on windy days.


how to make a garden art dish flower, crafts, gardening, repurposing upcycling


When picking pieces for your dish flowers take into account what it will look like from the sides.


how to make a garden art dish flower, crafts, gardening, repurposing upcycling


The best thing about a dish flower is there's no watering required.
If you have cold and snowy winters dish flowers should be safely stored out of the elements to keep them looking good.


how to make a garden art dish flower, crafts, gardening, repurposing upcycling


I added a vintage cufflink as the centre of the flower.
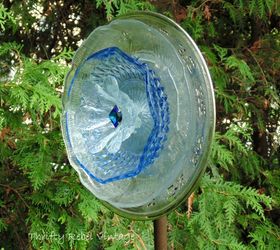
Now that you see how easy it is I hope you'll make one to decorate your own garden.
The possibilities are really endless. To see a few examples of others I've made please pop over to my site using the link.


how to make a garden art dish flower, crafts, gardening, repurposing upcycling


Original article and pictures take http://www.hometalk.com/10121607/how-to-make-a-garden-art-dish-flower site


Комментариев нет:

Отправить комментарий